Talking about Firewall, it is basically an application that prevents the systems from an assortment of threats, malware, unwanted programs, and Trojans. In a nutshell, firewall is always considered to be an important application, but at the same time, it should be noted that Windows firewall might block the internet access that is a must for certain QuickBooks related programs or files. This is the situation when majority of QB users stumble upon various errors. When the QB user makes an attempt to update the firewall to the latest version, then at that time the user might be required to configure the firewall software. To Configure firewall for multi-user mode in QuickBooks, involves a few simple steps. Configuring basically means carrying out steps so as to ensure that the firewall doesn’t block the internet access in near future.

Considering all these points, we have come up with this article today, where we will be discussing almost every aspect related to the configuration of QuickBooks firewall at the time of setting up the multi-users in QuickBooks Desktop. Thus, just stick to the article till the end for more information. Or a shortcut for the same can be to get in touch with our enterprise support team. Our team of accounting experts and professionals will ensure to assist you in the best possible ways.
You may also read: QuickBooks Error 30159: What It Is & How to Resolve It Quickly
Process to Set up firewall and security settings for QuickBooks Desktop
In order to configure QuickBooks firewall ports, the user has two options, namely:
Step 1: Automatically Configuring QuickBooks Firewall Ports:
The user can Configure firewall for multi-user mode in QuickBooks without human intervention, by downloading and using QuickBooks file doctor. The QBFD tool on lets you open the firewall ports and then configure the windows firewall. To can download the file doctor tool from QuickBooks tool hub.
Step 2: Configuring the firewall ports manually:
For the ones who want to opt for manual configuration, we have jotted down all the steps to be performed for configuring firewall manually.
Steps to Manually configure of firewall ports
- The basic step is to open the start menu, and then type in Windows firewall in the blank search space.
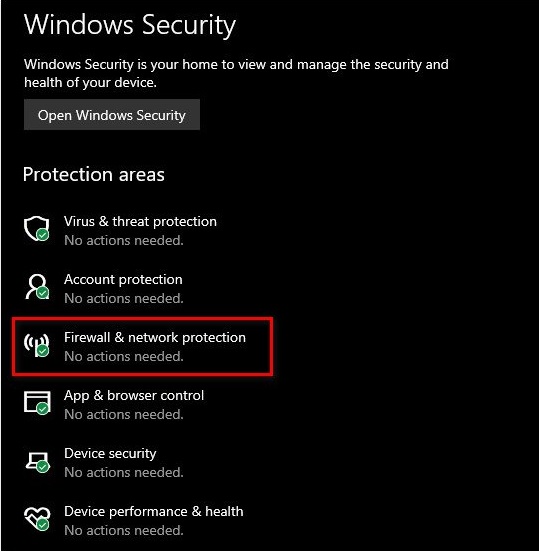
- Once the Windows Firewall opens up, the user is required to pick the Advanced settings option.
- And then, the user is required to right click the Inbound rules, followed by selecting the new rule.
- The next step in the process is to opt for the port and hit next.
- Moving ahead, the user is required to ensure that TCP is selected.
- And then, the user is supposed to enter the specific ports that are required for the QuickBooks year version in the specific local ports field:
- QuickBooks Desktop 2020: 8019, XXXXX.
- QuickBooks Desktop 2019: 8019, XXXXX.
- QuickBooks Desktop 2018: 8019, 56728, 55378-55382.
- QuickBooks Desktop 2017: 8019, 56727, 55373-55377.
- Once the user enters the port number, he/she is required to hit next.
- Now, make sure to opt for Allow the connection and hit next once again.
- Proceed by ensure that all profiles are marked, if prompted. To move ahead, tap on Next.
- The next step is to create a rule and name it just like “QBPorts(year)”.
- To end the process, click on the Finish option.
The point to be noted here is that, the user is required to carry out the steps above and create the outbound rules as well. All the steps will remain same, except the user is required to opt for outbound rules in step number three.
Important Note:
The user is required to keep a note that QuickBooks desktop 2020, 2019, and the versions to be introduced make use of dynamic ports. Dynamic ports are specific firewall ports assigned at the time of installation. With the help of this, it is ensured that the QuickBooks desktop gets exclusive use of a given port. For the QuickBooks desktop 2019 and the later versions, the port format is as follows: 8019, XXXXX. In this XXXXX is the dynamic port number.
In order to attain the dynamic port number, the user can carry out the following steps:
- The first step is to open the Windows start tab.
- Followed by typing in QuickBooks database server manager, into the search box and then open the same.
- Once done with that the user is required to visit the port monitor tab.
- And then look for the QuickBooks version.
- The next step is to take a noted of the Port Number, which will be used for the firewall port exception.
Once completing these steps, the user is required to consider that the assigned port number can be changes by opting for the renew option. After that visiting the scan folders tab and then selecting the scan now tab is recommended. The step performed by the user resets the firewall permissions. However, the user can renew the ports only for the Desktop 2019 and later versions.
See Also: How to Fix the QuickBooks Error 1321?
Steps to Create Firewall exceptions for QuickBooks programs
In case the user is still facing errors with the connectivity, then he/she is recommended to make an attempt to create exceptions to programs that QB uses in the Windows Firewall.
The steps to be followed are as follows:
- The basic step is to visit the Start menu and then type in the word firewall.
- Moving ahead, select the Windows firewall.
- And then, the user is required to select the advanced settings, on the right-hand side.
- The next step is to right click the inbound rules, followed by selecting the new rule.
- Now, the user is required to tap on the Program option, and hit next.
- Once done with that, visit This Program Path, and then tap on Browse option.
- Moving ahead, the user is supposed to follow the paths from the graph, and then hit Next.
- The next step in the process is to ensure that allow the connection option is marked, and click on next once again.
- Then verify that the profiles are check-marked, if prompted and proceed by hitting next.
- After that repeat the steps for outbound rules.
- And lastly the user is required to open the QuickBooks desktop again in various user mode or over the network to check whether the issue has been resolved or not.
| Executable files | Location |
| AutoBackupExe.exe | C:\Program Files\Intuit\QUICKBOOKS YEAR |
| Dbmlsync.exe | C:\Program Files\Intuit\QUICKBOOKS YEAR |
| DBManagerExe.exe | C:\Program Files\Intuit\QUICKBOOKS YEAR |
| FileManagement.exe | C:\Program Files\Intuit\QUICKBOOKS YEAR |
| FileMovementExe.exe | C:\Program Files\Intuit\QUICKBOOKS YEAR |
| QuickBooksMessaging.exe | C:\Program Files\Intuit\QUICKBOOKS YEAR |
| QBW32.exe | C:\Program Files\Intuit\QUICKBOOKS YEAR |
| QBDBMgrN.exe | C:\Program Files\Intuit\QUICKBOOKS YEAR |
| QBGDSPlugin.exe | C:\Program Files\Intuit\QUICKBOOKS YEAR |
| QBServerUtilityMgr.exe | C:\Program Files\Common Files\Intuit\QuickBooks |
| QBCFMonitorService.exe | C:\Program Files\Common Files\Intuit\QuickBooks |
| QBLaunch.exe | C:\Program Files\Common Files\Intuit\QuickBooks |
| QBUpdate.exe | C:\Program Files\Common Files\Intuit\QuickBooks\QBUpdate |
| IntuitSyncManager.exe | C:\Program Files\Common Files\Intuit\Sync |
| OnlineBackup.exe | C:\Program Files\QuickBooks Online Backup |
Read Also: How to Add a User License to your QuickBooks Software?
Steps to Configuring the firewall or antivirus programs
The user is required to note that, performing this is important, only if configuring the Windows Firewall and adding exceptions for QuickBooks firewall doesn’t resolve the issue:
- The robust number of firewall present and the changing versions might end up in Intuit being unable to supply additional configurations steps. The user might refer to the software’s documentation or the software publisher’s website for assistance.
- Intuit doesn’t engage in supporting different types of internet security programs available in the market nowadays. In various cases, the user should be fine by just adding the ports above to the windows firewall.
- In case the user continues to encounter errors in opening the file over a network or multi-user problems, make an attempt to add the following executable/directories to the program.
Incorporating QuickBooks ports exception on the antivirus or firewall
In case the user continues to face the issue, or is unable to open the file over a network or in multi-user mode, then the user can add port exceptions for these specific:
| Executable files | Location |
| AutoBackupExe.exe | C:\Program Files\Intuit\QUICKBOOKS YEAR |
| Dbmlsync.exe | C:\Program Files\Intuit\QUICKBOOKS YEAR |
| DBManagerExe.exe | C:\Program Files\Intuit\QUICKBOOKS YEAR |
| FileManagement.exe | C:\Program Files\Intuit\QUICKBOOKS YEAR |
| FileMovementExe.exe | C:\Program Files\Intuit\QUICKBOOKS YEAR |
| QuickBooksMessaging.exe | C:\Program Files\Intuit\QUICKBOOKS YEAR |
| QBW32.exe | C:\Program Files\Intuit\QUICKBOOKS YEAR |
| QBDBMgrN.exe | C:\Program Files\Intuit\QUICKBOOKS YEAR |
| QBGDSPlugin.exe | C:\Program Files\Intuit\QUICKBOOKS YEAR |
| QBServerUtilityMgr.exe | C:\Program Files\Common Files\Intuit\QuickBooks |
| QBCFMonitorService.exe | C:\Program Files\Common Files\Intuit\QuickBooks |
| QBLaunch.exe | C:\Program Files\Common Files\Intuit\QuickBooks |
| QBUpdate.exe | C:\Program Files\Common Files\Intuit\QuickBooks\QBUpdate |
| IntuitSyncManager.exe | C:\Program Files\Common Files\Intuit\Sync |
| OnlineBackup.exe | C:\Program Files\QuickBooks Online Backup |
Not only this, but also the user needs to ensure that the TCP is selected and also enter the ports that are required for the specific QuickBooks version. The port number is obtained in step 2 of the configure firewall manually. Also, note that the user might be required to add each year’s ports, in case he/she is operating multiple versions.
Read Also: How to Resolve QuickBooks Error Code 6000?
Step 3: Reboot your computer system
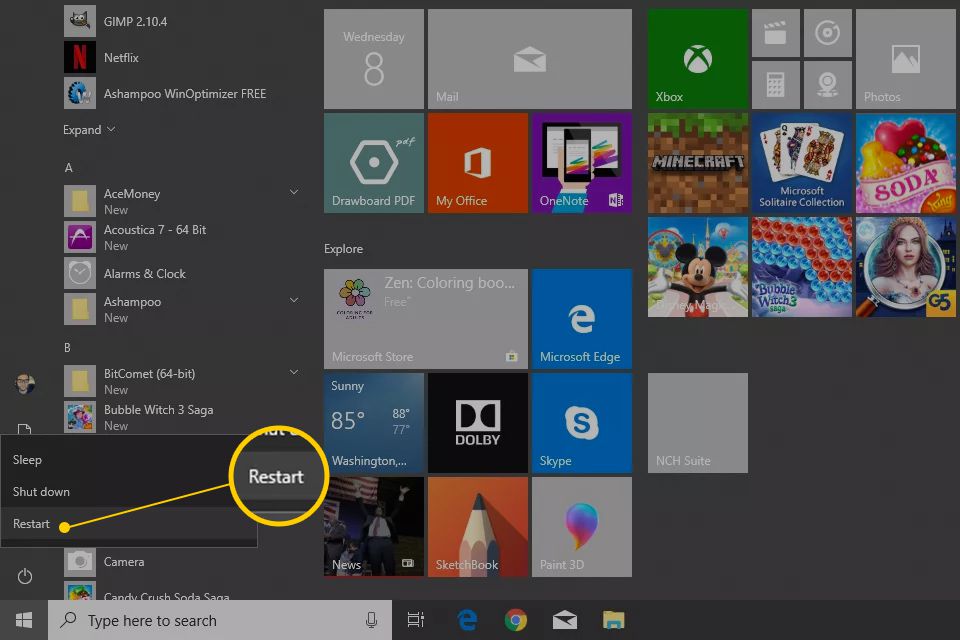
Many of the programs may ask you to restart your computer to save the current changes you have made. Restart your system once you have finished Setting up the firewall and security settings for QuickBooks Desktop. Now restart your computer system and then reopen software.
Read Also: How to Adjust Payroll Liabilities in QuickBooks Desktop?
Winding up!
With the help of this article, we have tried to provide the readers with the best possible guidance regarding configuration of your firewall. Carrying out the above steps in a proper manner can help the users Configure firewall for multi-user mode in QuickBooks without any issue.
However, if you are unable to tackle this thing even after following the steps mentioned above, you can simply consult our QuickBooks enterprise support team. Just pick up your phone and make a call to us, and our team will be there to assist you in a single call.
You might also like:
Resolving QuickBooks Error Code 30114 – Quick Fixes