")
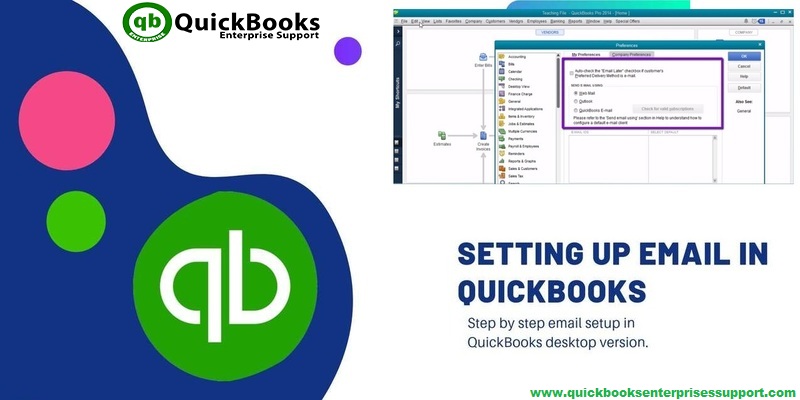
Emailing directly from QuickBooks save a lot of time, effort, and is considered one of the most effective features of QuickBooks. Many QuickBooks users face difficulty in setting up email in QuickBooks. Understanding this, we have come up with article, where we will be discussing the entire set up process for email in QuickBooks desktop.
However, for further information, the user can get in touch with our QuickBooks desktop support team via our toll-free number. Our team of experts and certified accounting professionals will answer all your QB associated queries with much ease.
You might also like: What are QuickBooks errors H101, H202, H303 and H505?
How beneficial is QuickBooks email setup?
No doubt, QuickBooks is one finest accounting software and the email feature of QuickBooks offers numerous benefits. We have jotted down, a few of the most compelling benefits of QB. Let us have a look:
- Direct Email invoices with QuickBooks email setup, and also send estimates to the customers.
- Also it is possible with this feature to set payment reminders to the customers via emails.
- This feature allows the user to fetch details from the customers and vendors.
- The user can also import data from spreadsheets and insert attachments up to 2 MB’s.
- You can also share reports within offices or departments with the help of QuickBooks emailing.
Information required to set-up email in QuickBooks
For setting up email in QuickBooks, the following information is mandatory:
- Username
- Password
- Outgoing email server address
- Incoming email server address
- Incoming email server type
What are Email Options in QuickBooks?
Before we discuss further, one of the most important points that matters here is that, it might be probable that the user is unable to spot the options for their particular email at their QuickBooks desktop setup, due to some or the other reason. Not only this, but also the user might have a different version other than the ones that are listed below. As, the system do not show each and every option in certain cases. Let us have a look at three of the options:
1. Outlook: The ones that have the Microsoft outlook installed already, can only avail the outlook support. It should be noted that the Outlook is preferred email client, as it offers more effective hold with much more ease.
2. QuickBooks Email: This option is not commonly used and liked by the users. As users usually prefer for the Outlook option .
3. Webmail: This feature was launched in 2011 in order to bridge with Gmail, Yahoo or any of the user own email platform.
You’ll also like: How to use QuickBooks component repair tool?
Procedure to set up email service in QuickBooks desktop
The procedure for setting up email in QuickBooks may vary for Outlook, Webmail, etc. Therefore, in this article, we will be discussing each of the procedure one by one.
Setting up Outlook
- In order to set up Outlook, the user is required to create a new QuickBooks Outlook email.
- If the user is already having an Outlook account, then the user is supposed to move to the Next.
- After that, gather information to set-up Outlook as the Email client.
- The next step is to setup Outlook in QuickBooks.
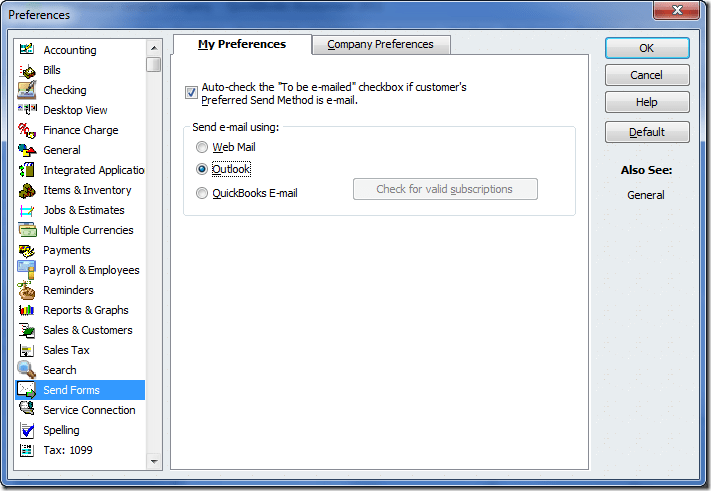
- Now, the user is required to choose Preferences and then press Send Forms, from the QuickBooks Edit menu.

- The last step is to select Outlook and then hit Ok.
Set-up email service in QuickBooks
- To set up email service in QuickBooks first of all, select the QuickBooks email settings.
- After that, QuickBooks email option can be used by the users that have any of the active Intuit services just like QuickBooks Payroll, etc.
- The next step is to fill in the required information such as the email address, password, username, etc. Once you have entered the information, you are done for emailing.
See Also: How to Fix custom email template issues in QuickBooks desktop?
Set-up Webmail
For the ones who have the latest version of QuickBooks, they can make use if the secure webmail. The connection via a secure webmail is only available for certain providers, such as:
QuickBooks 2020, 2019 – Available for Gmail, Yahoo mail, Windows Mail, AOL, Hotmail, etc.
QuickBooks 2018 – Available for Gmail & Hotmail/ live users in the US, UK, and Canada.
QuickBooks 2017 – R5 and newer versions are available for Gmail users in the USA only.
QuickBooks 2017 – R4 and Older version- The secure webmail option is not available for this version.
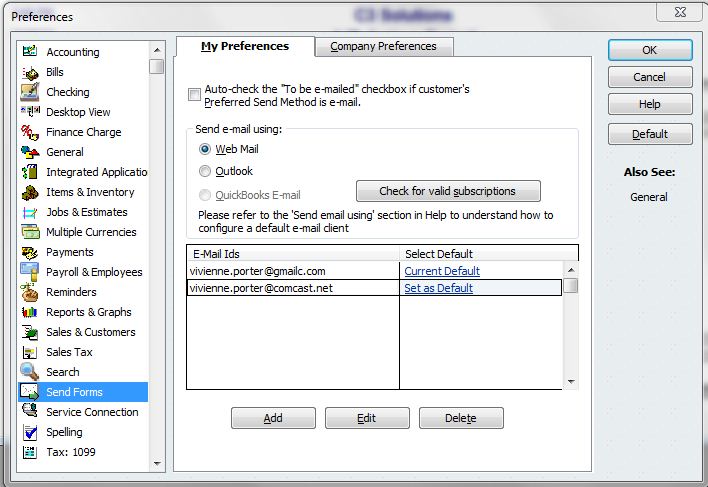
- The first step is to select edit menu, and then select send forms.
- The next step is to choose My preferences tab and then choose the Webmail radio out of the options that would be visible.
- Once done with that, the user is required to enter the email address that they wish to use for QuickBooks emailing.
- The next step is to choose the SSL security checkbox.
- And then, enter the correct SMTP server and port configuration, followed by hitting Ok key.
- The user is then required to send the email and check if any kind of error is seen.
You may also read: How to Resolve QuickBooks Error Code 6000?
Steps to be followed for setting up regular Web mail
Before the user get started with the process, it is highly recommended to verify the server and port information with the ISP.
- The Webmail servers and the port settings are governed by ISP.
- The QuickBooks Desktop fill out the information for some of the most common providers, just like Gmail, Yahoo, and Hotmail/live.
- The list below can be used to find the server and port information.
- Visit the Preferences option and then choose the Send forms option from the QB edit menu.

- Once done with that, the user is required to select the Webmail and then hit add button.
- After that, enter the email address after selecting the provider from the drop-down menu.
- The last and final step is to hit OK key.
Internet Service Provider (ISP) and Port Information (For US Version)
| ISP (Internet Service Provider) | SMTP Server | SMTP Port |
|---|---|---|
| 1AND1.com | smtp.1and1.com | 587 (SSL enabled, with password) |
| ADELPHIA | mail.adelphia.net | 110 |
| AOL | smtp.aol.com | 465 or 587 (see Note) (SSL enabled for incoming and outgoing mail server) |
| BELL SOUTH | mail.bellsouth.net | 110 |
| COMCAST | smtp.comcast.net | 587 |
| COMPUSERV | smtp.compuserve.comsmtp.aol.com | 110 or 587 |
| COX Business | smarthost.coxmail.com | 25 |
| COX CENTRAL | smtp.central.cox.net | 25 |
| COX EAST | smtp.east.cox.net | 25 |
| COX WEST | smtp.west.cox.net | 25 |
| EARTHLINK | smtpauth.earthlink.net | 25 (with password) |
| GODADDY | smtpout.secureserver.net | 80, 25, or 3535 |
| GODADDY with Office 365 | smtp.office365.com | 587 (SSL enabled) |
| LYCOS | smtp.mail.lycos.com | 25 |
| MICROSOFT OUTLOOK 365 | outlook.office365.com | 587 (SSL enabled) |
| NETSCAPE | smtp.isp.netscape.com | 25 (SSL enabled) |
| PRODIGY | smtp.prodigy.net | 25 (SSL enabled) |
| ROADRUNNER | smtp-server.sc.rr.com | 587 |
| SPRINT PCS | smtp.sprintpcs.com | 25 |
| VERIZON | outgoing.verizon.net | 465 |
| VERIZON YAHOO | outgoing.yahoo.verizon.net | 465 |
Read this also: How to Overcome QuickBooks Error Code 6189, 816?
Internet Service Provider (ISP) and Port Information (For Canadian Version)
| ISP (Internet Service Provider) | SMTP Server | SMTP Port |
| MICROSOFT OUTLOOK 365 | outlook.office365.com | 587 (SSL enabled) |
| BELL MAIL | smtphm.sympatico.ca | 25 (or 587 if port 25 does not work) |
| BELLNET | smtpa.bellnet.ca | 25 |
| CLUB INTERNET | smtp.club-internet.fr | 25 |
| COGECO | smtp.cogeco.ca | 465 |
| COMCAST | smtp.comcast.net | 465 |
| EARTHLINK | smtpauth.earthlink.net | 587 |
| GMAIL | smtp.gmail.com | 587 |
| HOTMAIL | smtp.live.com | 587 |
| LAPOSTE | smtp.lineone.net | 25 |
| smtp.aol.com | 587 | |
| MSN | smtp.live.com | 25 |
| MTS | smtp.mts.net | 25 |
| NETSCAPE | smtp.isp.netscape.com | 25 |
| NETZERO | smtp.netzero.com | 25 |
| NEUF | smtp.neuf.fr | 25 |
| ROGERS | smtp.broadband.rogers.com | 25 |
| SASKTEL | mail.sasktel.net | 25 |
| SHAW | shawmail.cg.shawcable.net | 25 |
| SKYNET | smtp.skynet.be | 25 |
| SYMPATICO | smtphm.sympatico.ca | 25 |
| TELUS | smtp.telus.net | 25 |
| VIDEOTRON | relais.videotron.ca | 25 |
| YAHOO | smtp.mail.yahoo.com | 465 |
See Also: How to delete a deposit in QuickBooks?
Conclusive lines..!!
In this article, we have tried to provide all the information that the user would require to set up email in QuickBooks desktop. We hope that after reading the steps listed above, it would be easy for the users to set up email in QuickBooks on their own.
However, if the user is unable to perform these steps, or in case any of your doubts remained unanswered, then do not hesitate in speaking to our professionals. Just ring up at our toll-free number and our QuickBooks enterprise tech support team will be there to assist you.
You’ll also like:
How to Solve QuickBooks Registration File Errors?