Are you finding it tough to juggle your small business finances? With QuickBooks’ Chart of Accounts, you have a powerful ally by your side! Whether you’re a seasoned accounting pro or learning the ropes as a small business owner, knowing how to set up your Chart of Accounts in QuickBooks is absolutely vital for keeping your finances organized and gaining meaningful insights into your business’s financial position.
What is Chart of Accounts?
Think of the Chart of Accounts as the sturdy backbone of your business’s financial structure in QuickBooks. It’s an organized register listing all your business’s accounts—like assets, liabilities, equity, income, and expenses. Each of these accounts has its own purpose, allowing you to accurately track and categorize every financial transaction you make.
Why is the Chart of Accounts Important?
A well-structured Chart of Accounts establishes a clear framework for recording financial transactions and generating essential reports. Here’s why it’s essential:
- Track Income and Expenses: Easily categorize your business’s earnings and outgoings for sharper tracking and analysis.
- Monitor Cash Flow: Stay on top of your cash flow by recording every transaction in the right spots, such as checking accounts or credit cards.
- Assess Financial Health: Understand your business’s financial position using essential reports like Profit and Loss and Balance Sheet, which draw directly from your Chart of Accounts.
- Prepare for Taxes: Organize your numbers so your tax filing becomes smoother and more accurate.
Also Read: QuickBooks Setup Guide for First-Time Users
Creating Chart of Accounts in QuickBooks
QuickBooks Online:
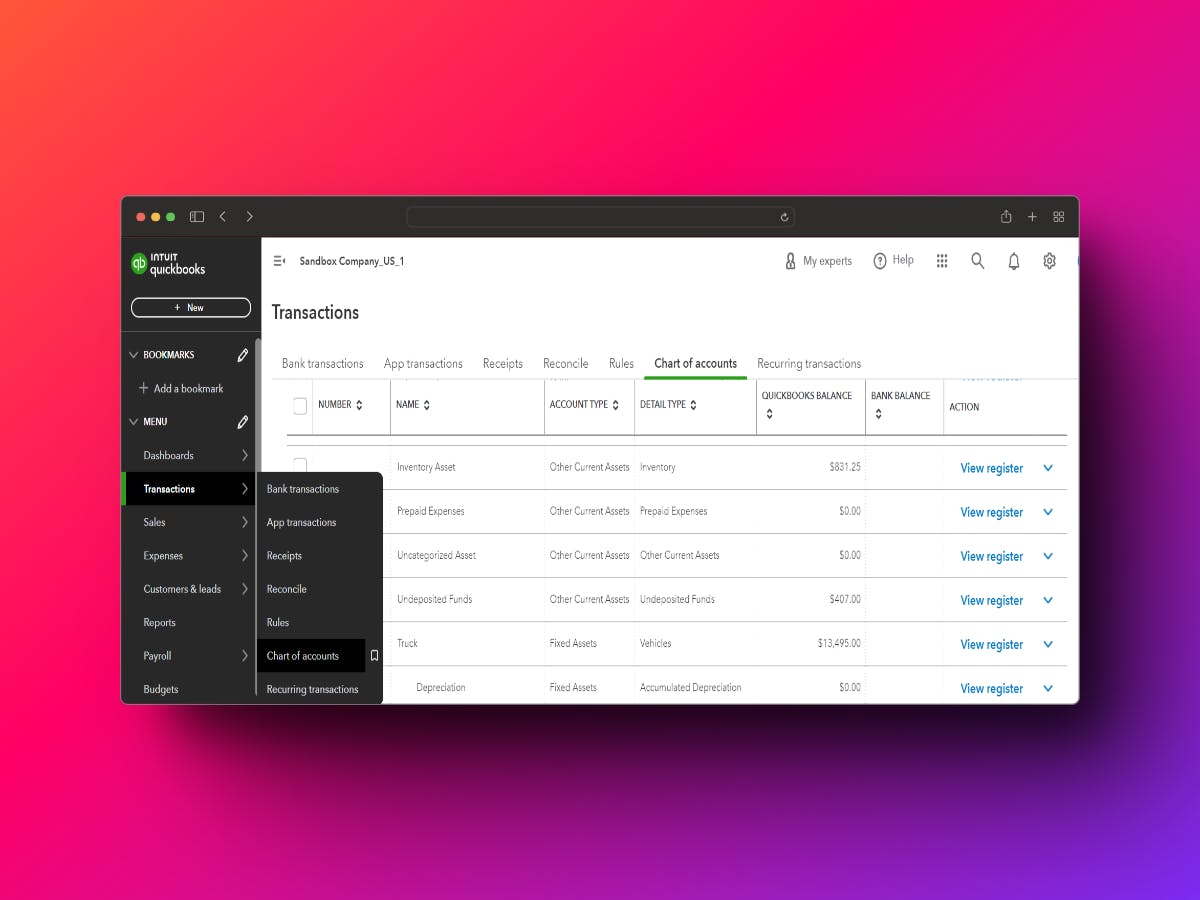
- Access the Chart of Accounts: Log in to your QuickBooks Online account, navigate to the "Transactions" menu, and click on "Chart of Accounts."
- Add a New Account: Click on the “New” button at the upper right. Choose the type of account you want to add—bank, credit card, income, expense, asset, liability, or equity.
- Choose Account Type: Select the type that matches the account you’re adding.
- Name the Account: Give it a clear, descriptive name that tells you and your future self what it’s for.
- Add Additional Information (Optional): Add information like account number, a description, and, if needed, tax-line mapping.
- Save the Account: After entering the details, click “Save” to create your account.
- Edit or Inactivate an Account: Need to tweak or retire an account? Click its name, then choose “Edit” or “Make inactive” as needed.
QuickBooks Desktop:
- Open QuickBooks Desktop: Launch QuickBooks Desktop and click on the "Lists" menu. Select "Chart of Accounts" from the dropdown list.
- Create a New Account: Click the “Account” button at the bottom left, then select “New.”
- Select Account Type: Pick an appropriate type from the menu.
- Enter Account Details: Name your account, give it a description, and assign a tax-line mapping if it applies.
- Save the Account: Click “Save & Close” when you’re finished.
Examples of Accounts in the Chart of Accounts
- Assets: Accounts receivable, inventory, bank accounts, equipment.
- Liabilities: Accounts payable, loans payable, credit card balances.
- Equity: Owner's equity, retained earnings.
- Income: Sales revenue, service revenue, interest income.
- Expenses: Rent, utilities, salaries, office supplies.
Tips for Organizing Chart of Accounts
- Keep it Simple: Don’t go overboard with too many accounts, which can bog down your financial reporting. Stick to what’s essential and relevant.
- Use Sub-Accounts: If you need more detail, create sub-accounts beneath main accounts to add clarity without creating clutter.
- Regular Review: Make it a habit to periodically review your Chart of Accounts. Update it to reflect any changes in your business’s financial setup.
Conclusion!
Setting up your Chart of Accounts in QuickBooks is a foundational step to mastering your small business finances. By following this practical guide and grasping what each type of account means, you’ll have the tools to organize your financial data, gain actionable insights, and make informed decisions pushing your business forward.
If you run into any obstacles or questions about QuickBooks Accounting and Bookkeeping, don’t hesitate to contact our ProAdvisors at Transync Pro. We’re always here and genuinely happy to assist you!
Some More Important Reads:
Creating and Utilizing Classes in QuickBooks
How to Send an Invoice in QuickBooks?
How to View Profit and Loss Report in QuickBooks?